All filters are the 77 mm versions, and they were tested on a Nikon 16-35mm f/4 lens on full format.
1. Build quality
Let’s start with the build quality, because this had an impact on my tests: The Haida Slim MC filter had a thread that was somehow off, I couldn’t mount it to the lens properly and it would get stuck half way. So I couldn’t test it properly. It doesn’t really impact the test content, though, since I still had a slim (but non-MC) version and an MC (but non-slim) version to test, so you can simply combine the results of those. But anyway, worth mentioning. The other two Haidas were flawless, though.
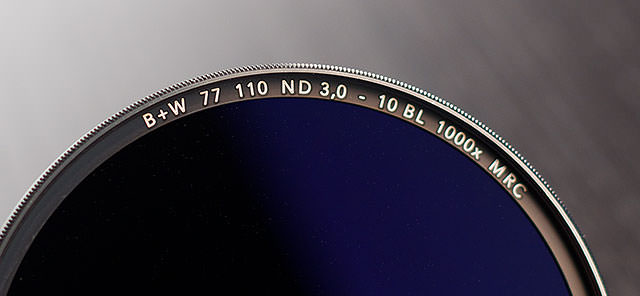
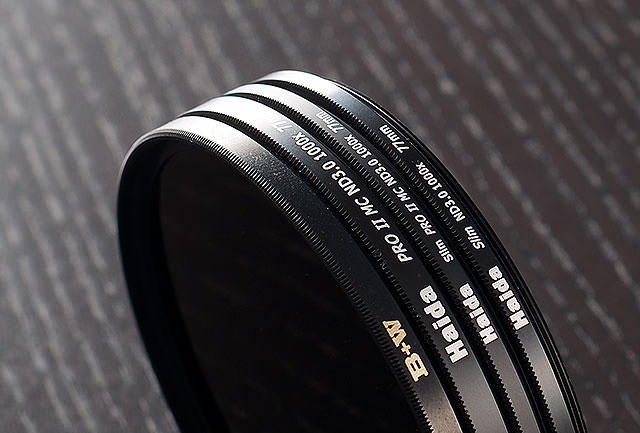
The letters on the filters are applied, not engraved. Also on the B+W.
While the B+W filter frames are made from that famous brass, the Haidas come in something that I’d guess to be aluminum, which makes them lighter. The B+W finish appears a little rough at first glance, since it’s not clean black but the brass sort of shines through. The finish of the Haidas looks nicer in my eyes, but that’s a matter of taste. After all, who’d admit they care about the looks of their equipment… right? On all filter frames, the letters are applied, not engraved.
The feel when you screw the filters into the cheap plastic thread of the 16-35mm f/4 Nikon lens is actually a little less “scratchy” and hence smoother with the Haidas than with the B+W.
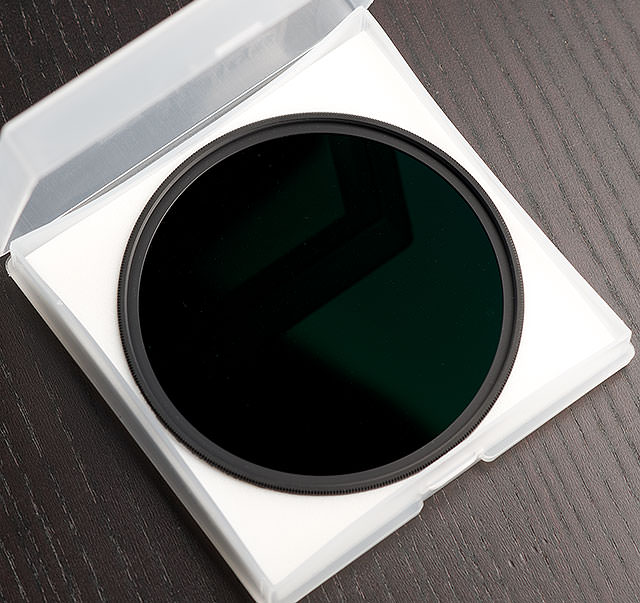
The sides of the Haida box bend to the inside
While we’re at it: Although it might be hard to believe that a cheap plastic case can make much of a difference, the case of the Haida filters indeed has a slightly cheaper feel than the B+W. This is due to the detail that the sides of the bottom part are a little concave (bending to the inside). Maybe, it’s because of this that you have to fiddle around quite a bit to get the filter sit properly in the padding. In the B+W case, it just fits. What a difference two cents in production costs can make.
2. Sharpness reduction
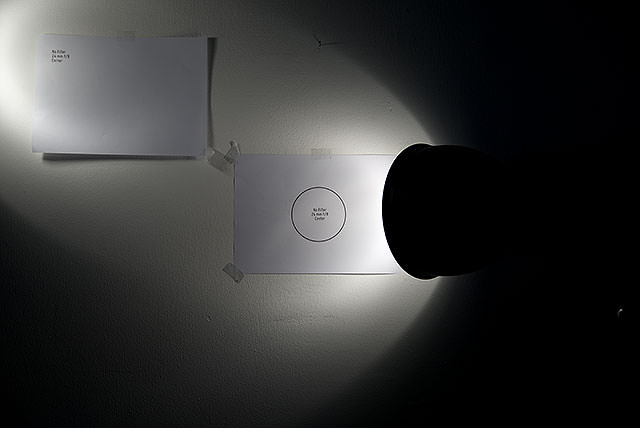 To check this out, I chose an extraordinarily beautiful subject: I printed text on sheets of paper and mounted them in the frame on a flat wall. The camera was of course on a tripod and aligned exactly rectangular to the wall using a laser level.
For all tests, I’ve been using the Nikon 16-35mm f/4 lens, which is what I’m using the ND filters with. According to DxO, the 24mm setting is the one with the highest sharpness also in the corners, so I’m using that. The lens is set at f/8, also because this is the supposedly most even-sharp setting. I’m using the full-power modeling light of two studio strobes with normal reflectors to illuminate the beautiful subject. The result looks like what you can see on the right.
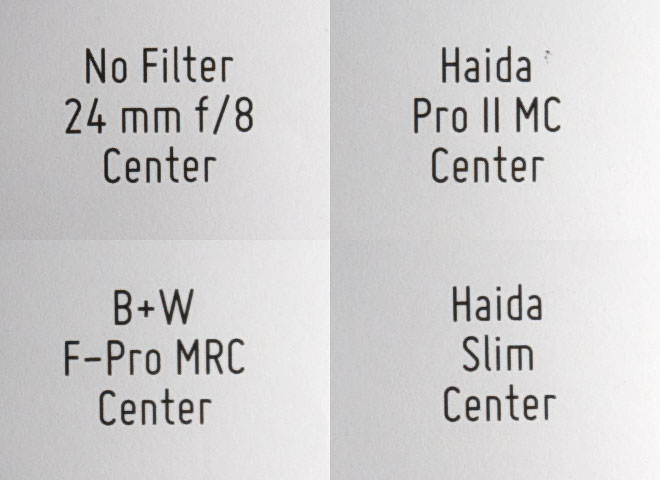
Here are 100% crops from the individual 36-MP images. Center:
Corner:
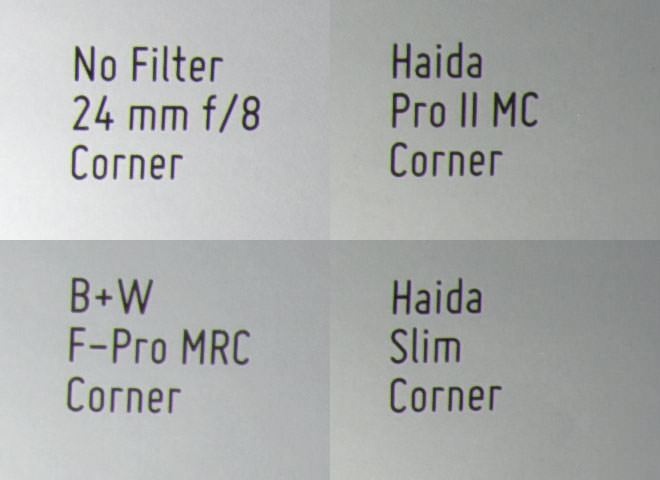
If you ask me, I can’t see a difference in sharpness. What I can see is how unexpectedly bad the lens performs. And the 16-35 f/4 is supposedly rather sharp.
3. Flare resistance
 As ND filters of this type are often used in bright daylight, flare resistance is very important for me. All multi-coated B+W filters I’ve used so far are incredibly resistant to flare. How about the Haidas?
I took two test images for each filter, both at 35mm, one with the light source within the frame, and one with the bright light source outside (top right) the frame. As a light source, I again used a studio strobe with normal reflector and modelling light on full power (250W), as you can see on the image on the right.
Results
Here are the results for you to click through. With the slider, you can always compare filter (left image) with no filter (right image):


")


– light source outside frame")
As you can see, the B+W doesn’t add any flare at all, while the Haidas do. In fact, there is no difference between the coated and non-coated version. The non-coated version does add a little more haze, though.
Vignetting, color cast, actual transmission
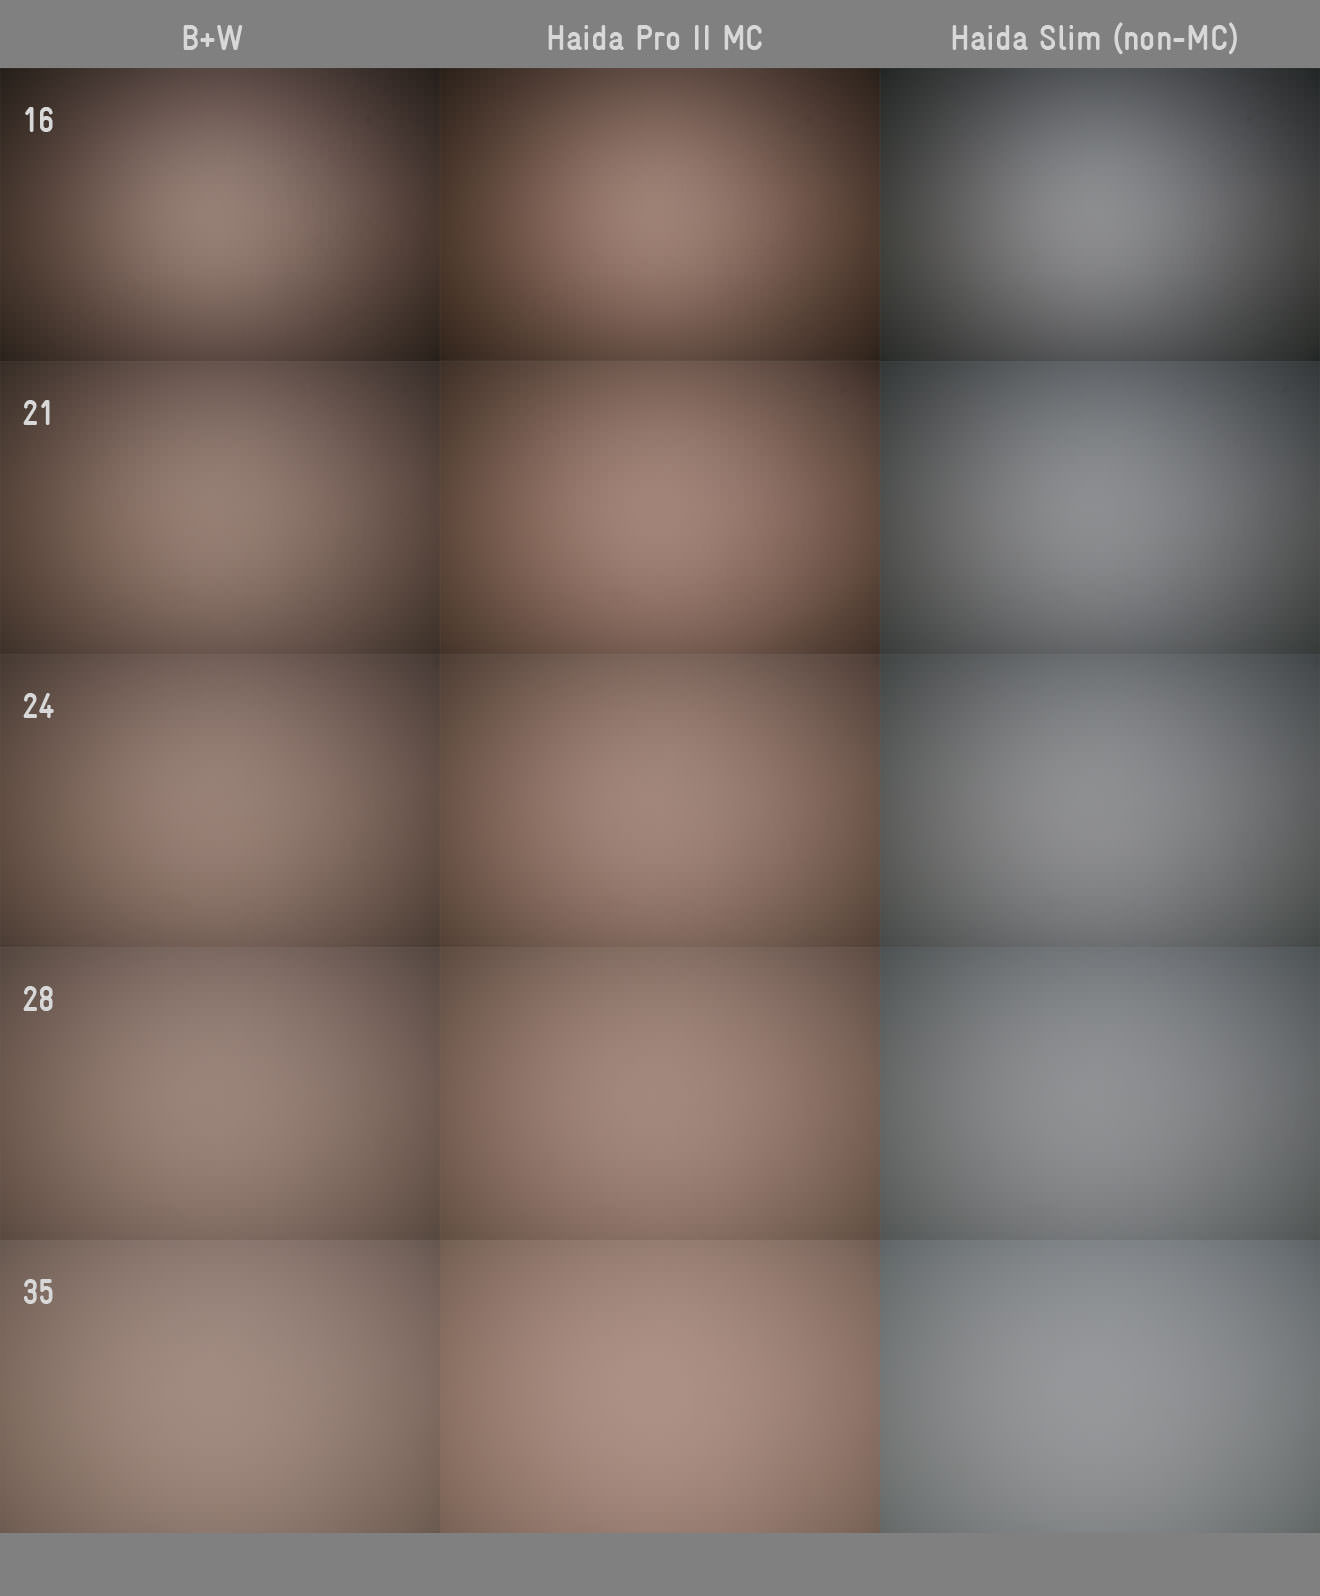
No, my passion for beautiful imagery didn’t stop with the sheets of paper from the sharpness comparison. Here are some more. The following images illustrate all three criteria mentioned in the title at once.
The images have been taken against the evenly-illuminated white studio wall, using studio strobes with large softboxes and the modeling light on full power. Again, the lens was set to f/8, because this produces a rather vignetting-neutral result. You can see the image without any filter in comparison further below. The top and bottom bar are neutral gray.
4. Transmission
All of the above shots were taken with the calculated exposure times – 10 EV lower than the camera measured for the image without the filter.
There’s actually not much difference: In the center, all filters are a little lighter than they should be, meaning they are maybe a fifth EV less dense then their nominal value. The are slightly different in detail, but at this level, who cares? I don’t. All of them work, and for me, it wouldn’t be a criterion to prefer one over the other.
5. Vignetting
Any ND filter produces rather strong vignetting with wide-angle lenses, no matter how high the quality. Which is simply because the light from the wider angle is hitting the filter in a steeper angle than the light from the middle of the frame. Hence it has to pass through more (tinted) material. If you wanted to avoid this effect, you’d have to make the filter convex and not flat.
This effect cannot be eliminated by stopping down – naturally, because it won’t change anything in the logic fo the above description.
Results
As you can see above, all filters produce a strongly visible vignette, and just like with the sharpness comparison, there’s no visible difference.
Interestingly: Do you see any filter mount getting in the way?
6. Vignetting, part II: From The Filter Mount
That’s one small difference for a filter frame, and actually not much of a difference for your images at all: The two normal-size filters compared with the two slim filters.
No, you don’t. Neither with the Slim nor the normal versions. None of the filters’ frames gets in the way of the image! Although B+W claims it’s only usable down to 24mm, you can use the non-slim version even for 16mm. Same goes for the Haidas: Slim or non-slim, it doesn’t matter. In other words:
There is actually no advantage of the slim versions over the non-slim versions for normal filter usage.
The issue starts when you want to use another filter on top of the ND filter, i.e. a polarizer. The slim versions are 1.8 mm deep as opposed to 3 mm of the normal versions. When I mount my HOYA HD Circular Polarizer onto…
- …the B+W F-PRO, I can zoom back to 22mm focal length, at 21mm the filter frame becomes visible in the image corners.
- …the Haida Slim filter, I can go down to 21 mm focal length, at 20mm, the filter frame becomes visible in the image corners.
 So, the advantage is actually only 1 mm in focal length. The value can be directly transferred to the B+W X-PRO Frames (in case they will ever make an X-PRO version of this ND filter class), as they have the same dimensions as the Haida Slim filters.
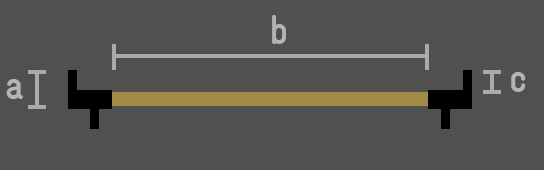
Filter Frame Dimensions (for 77 mm versions) | B+W F-Pro | Haida Pro II (Standard) | Haida Slim | B+W XS-Pro* |
|---|---|---|---|---|
| Ring Depth (a) | 4.5 mm | 4.5 mm | 3 mm | 3 mm |
| Glass Diameter (b) | 71.5 mm | 71.5 mm | 71.7 mm | 71.8 mm |
| Female Thread Depth (c) | 3 mm | 3 mm | 1.8 mm | 2 mm |
* There is no XS-Pro version of the B+W 1000x ND Filter (yet), these values are taken from another 77mm filter frame for comparison.
7. Color cast
While you usually can correct the cast by simply using a gray card and the eyedropper tool in your image editor, there’s always the risk of not getting rid of the cast completely. This is due simply to the different intensity of the cast to shadows and highlights. If you’re in bad luck, the cast cannot fully removed unless going into rather deep editing. Which is the reason why it’s important that the color cast and you can become friends.
All images above have been shot in RAW and then white balanced (using the eyedropper tool in Aperture) to the same value that the first image without the filter used. Hence, all of the color cast you can see is purely from the filter.
As you can see from the above, the B+W features a brownish sepia-like cast. Since the multi-coated Haidas have pretty much the same tone to them, I guess this has to do with the coating. In the histogram (below), you can see that the channels of the Haida MC are more apart than the B+W, meaning the cast is even more intense. The non-coated Haida has a slightly cool cast to it which is rather neutral and easy to fix. The following histograms are from the 35mm test shots that you could see in the bottom row of the Vignetting comparison above:

Even if it’s harder to remove, I don’t really have a problem with the B+W’s color cast. Again, a matter of taste. But if you want neutral, the non-coated Haida is the winner.
Continue with part 3: Real-world Relevance & Summary
Go back to part 1: Introduction
Hi,
Love this review! I’m intersted in buying one of the Haidas.
I’ve you done more tests about color casting of the two slim (the one with MC and the one without)?
Thanks
Regards from Spain!
Hi Ema,
Thanks for your feedback. Sorry, but I don’t fully understand your question, do you want more tests concerning the color casts of the filter? What exactly do you have in mind?
Thanks,
Flow
I’m really sorry for my bad English :(
Yes, I would like to know if you made more tests concerning the color casts and which are the results.
Not sure if go for the slim MC version vs the slim one.
Thanks
No worries! :-) What additional tests exactly do you have in mind that you would like to see?
It’s very simple, I would like to see images of real life without color/vignetting reduction in PP, using the slim version, the slim MC one and one without filter. And at the minimum mm possible. This is because I would like to see how hard it will be editing a shoot with the fliter.
Thank you very much :)
Well, for the color cast, no need to worry about the editing, because it couldn’t be simpler – it’s one click:
Get a grey card, hold it in front of the lens so it gets the same light as the scene you want to photograph, and take a picture. When you edit the image, adjust the white balance by clicking on the grey card with the eyedropper tool. Done.
Without a gray card, forget it. It takes lots of fiddling for all the filters.
Hello,
First of all thank you for very informative and interesting comparison. It helped me to decide which ND to get. I have bought Haida slim version. Would like to test it out, however I have one question: how to get good white balance and get rid of color cast in raw? What is the procedure using white balance card (18% gray card), or white balance cap: 1) make a photo of a card/through white balance cap 2) only then make a photo with ND filter using auto WB or any other WB setting (does not matter) 3) correct in PS or other software, using image of a card, or image obtained through white balance cap/other stuff which is 18% gray, as a reference?
I am eagerly waiting for your reply. Very frustrated sorting things out about all this ND – neutral gray which is not neutral at all.
Hi Vitalis,
You’re mixing things up with those WB helpers. Regarding your questions:
1) You don’t take a photo of an object through the cap, but you use the cap alone. The cap produces a diffuse panel for the camera so that it can only see… well a diffuse panel. If you then use the preset function of your camera, that’s how it sets the white balance. If you want to use the cap with the filter, you have to first attach the filter and then the cap.
2) Using Auto WB only will not get you good results, forget about that.
3) Yes, shooting RAW and setting WB in post would be the best choice. I use the grey card method. You place the card in the image frame somewhere and take a picture (see my last answer to Ema here), of course with the filter attached, otherwise it doesn’t make sense. This picture you can use as a reference for setting the white balance using the eyedropper tool in your editing software. It’s very easy and very effective.
Hello once more,
Thank you very much for your help. As I always shoot in .Raw it seems that a gray card method is more relevant. Though when exposures are super long both methods may be a frustration as filter must be on. What a pity that auto WB can’t handle its job.
Best luck to you. Hope to read more articles from you. Cheers.
Pingback: Belgiumdigital Forum
i have a 10.000 heliopan. and thats not the maximum. btw. i hardly never use it and heliopan stopped the production line.
no wonder, even a 1000 is often too much.
Hi,
I´m wondering if it could be helpful mounting e.g. a 72mm filter on a 77mm adapter in order to reduce (or to avoid) vignetting. Could it be helpful to go this way always with any ND filter also to avoid vignetting in case of adding a second filter?
regards, Stefan
Sorry, I ment 77mm Filter on a adapter from 77mm to 72mm adapter
Hi Stefan,
Well, you will reduce the vignetting from the filter frame getting in the way, yes. It won’t reduce the vignetting from the filter glass itself, which is due to the nature of the filter being flat, as described in the article.
Best,
Flow
Thanks for the review, I am happy to see that the haida alternative is enough to not be worried about our dear images. Actually I bought a haida ND1000 in June if I remember well. I had my father’s B+W filters but they are for 55mm and my lens is 67mm so I wanted B+W quality (I tried a step up ring to see the iq with these filters), or at least that didn’t degrade so much the image and needed just a bit of WB correcting and raw therapee.
I saw some positive reviews and bought one, I noticed I wasn’t ask for the slim version but fortunately I don’t see vignetting in the 24mm focal lenght (so it was cool save some bucks) and with auto WB the camera the colors are accurate to my amateur eyes (except when I stack the marumi dhg super but with raw it is fixable)
Now I’d want to buy a haida glass (real glass, not cr34 resin) graduated filter. I bought a resin reverse grad from other brand (haida hasn’t reverse grads) but now it has scratches. I hope that they’ve the same quality.
Francis, thanks for your feedback. What’s a reverse grad? I would have thought you can ‘reverse’ the grad simply by turning it upside down?
Hi, thanks for read my comment :). A reverse Grad is one that has the stronger part in the middle, and after that fades out to the extreme, it is in “reverses” of the normal grads that are stronger in one extreme to soften in a hard or soft gradation to the middle.
They are perfectly suitable to sunsets or sunrises because the part that needs more filtration is precisely the sun that is in the horizon and not in the upper side. Turning upside down a normal grad has no use because the stronger gradation is again in the extreme and not in the horizon line where the sun is.
Regards from Peru.
Francis, thanks for the enlightenment :-)
Regards to Peru (wow!),
Flow
Hi,
I’m looking for strong ND filters for 10mm (Tamron 10-24mm) APSC.
Will the Haida 77mm filter vignette on 10mm, 15mm effective? You tested at 16mm FF, so I guess not, but it would be nice to confirm.
Even better, how would 2 stacked slim Haidas work for 10mm on APSC?
Hi Zoran, sorry, but since I don’t have any of the products you are asking about, I can’t answer this. It’s not only a matter of focal length, but also of the individual lens layout (thread etc.).
Oh, well. I’m almost settled on getting the Haida. Probably 2 of them. I’ll post back about vignetting (if I don’t forget that is).
Pingback: Filter Komplettset vs. Hoya HD Filter - Systemkamera Forum
Pingback: Anonymous
Thank you very much for your help!
I got the Haida 10 stop filter. Awesome!
I made a video about it and it’s incredible
http://www.youtube.com/watch?v=b7poGVmrTzc&list=UUBdpwK9fWoxfp3JAPtwJ9_g
Thanks! Why is your video so bad quality, did you use your webcam instead of your real camera? :-)
Thank you so much for this review!
Thanks for your feedback!
I would like to see a test of the Haida variabel ND filter as well :-)
Hello Flow,
thank you so much for this review. I’m thinking to buy a set of haida nd filters (Slim Pro II MC – ND8, ND64 and ND1000) all for 130€ bug I found a new B+W ND1000 for only 70€. I really don’t know if it’s worth to buy only the B+W or the three ones made by Haida just adding 50€. Can you advice me on this matter?
Danke shein. :)
Well it all depends on what you want to do, i.e. if you’ll use the ND8 and 64 more than once. ND1000 is really a whole different type of image that you use it for (loooong exposure vs. just bringing the value down a little in bright environments with the ND8 and 64). If so, you have to use the pros and cons from the test results to evaluate for yourself how much they are worth to you. The Haidas sure offer very good value for money, but as in this case, it means spending more money, it makes the choice a little tricky… ;-)
I have been using the Haida ND filters (0.9, 1.8 and 3.0, Slim Pro II MC, 82mm and step down rings) for about a year now, and am very happy, especially considering the price, with them. In real world pictures, I have not noticed any detrimental amounts of flaring, as you also demonstrate with your pictures of the Siegessäule.
Thanks for sharing your experience, GG Green!
It looks like you feel that the MC version doesn’t offer enough advantages over the non MC to justify the additional cost. Do you still feel that way?
Thanks, Steve! Since I didn’t test the filters again, everything I wrote in the article is still what I think about it.
Pingback: welke nd filter kiezen? Ervaringen?
Hello and greetings from India.
I am planning to buy Haida Slim PROII Multi-coating ND 3.0 (1000x) ..
Can you please let me know how it is. It costs me around 55$. Is it worth the money or should I go for Hoya ND8 which is available for almost the same cost?
Please excuse my amateur questions.
Hi Dhruva, thanks for your question. I can’t tell you about the Hoya, but the Haida is in this test, so you can check out the results or read my verdict on it in the test.
Thanks for your review. I’m going to buy a Haida ND now
Hi, I have jsy one question. I own Hoya ND filter and what I found is I berly can clean it! I ruined my pictures from Ireland becasue of it. Did you check how it looks with Haida?
Hi Blazej, yes I did, it’s in the table on the last page.
Many thanks for conducting this testing and publishing the results. Seems there are a lot of ‘opinions’ out there about various ND filters so it’s nice to see some real World data. I’ve been using the Singh Ray ND grads for years and am now shopping for a straight ND for use in daylight conditions – I think I’ll give the Haida a go instead of spending the BIG bucks for Singh Ray’s ‘Mor Slo’ product.
Thanks and Regards,
Bill / Oceanside, CA
Thanks for your feedback, Bill!
Hi Flow.
Firstly, I want to say thank you for your detailed review of the Haida ND. You know, I have spends few weeks to research GND. Because I have very tight budged, so I have to see carefully. I did not find anything fit my wish. Luckily, today I see an ads about Haida GND with very reasonable price. So I search it and, luckily, I find your review.
I am using Sony A57 with SAL 16-50mm f2.8 SSM. I am very interested in landscape photography.
Can you tell me, with a very tight budget, what Holder and GND should I buy? I have never used/touched any GND filter before.
Thank you so much. wish you all the best
P/s: Do you have facebook or flickr so that I can follow your photos and reviews. Thank again
Anhthe, thanks for your nice feedback! If your budget is very tight, just get the Haida non-MC version. As you can see from the samples in the review, there is no real advantage of the coating. In fact, the Haida non-MC is the exact product for you: low price, high quality. Concerning the “holder” (I guess you mean adapter?), just get the right filter size for your lens in the first place, or if it’s small and you think of buying lenses with larger filter sizes in the future, just get a larger filter size and a corresponding adapter for your current lens.
Pingback: Anonymous
I saw pics with Hoya vs B+W and the latter was totally brown there were no blacks and greys left all was evenly browned out.Isn´t that horrible for 100 times the price ?
It’s not possible that a filter turns black into brown other than if it’s not completely black yet. The darkest gradation will always be black. And it’s logical that a tint of whatever hue (such as the brown with the B+W or the Hoya MC) will apply evenly to the entire spectrum. You can see the tint in this test, too, and as I said, they are not problematic to cure with the White Balance tool.
If you’re using film, this is of course a different story.
Hi, very precise and to the point review. I’m very new to the long exposure photography and was looking for ND filter that doesn’t cost close to my lens!
Apparently there is no stock available in UK for non-MC ND3.0. However there is stock for the 3 filter set(3 stop,6 stop,10 stop) both non-MC and Pro II MC version(cost £30 more). Do you think I can go for non-MC slim 3 filter set(£69) or it’s worth paying extra for the latest version.
Thanks, Pritam. As I wrote in the review, from the results there’s no real reason for getting the MC version. Check out the flare images comparison. The only upside is it might make you feel better. :-)
Hello
Thanks for good review
I have a question
If i use 77mm thread lens(24-70 2.8), Does 77mm filter better than 82mm filter with 77 to 82mm step up ring, in terms of vignetting ?
i.e. Does the extra step up ring depth with 82mm filter will actually yield the same results in terms of vignetting?
thank you
Hey Maxim,
The vignetting caused by filters is introduced by the fact that the light has to travel diagonally through the filter on the outer sides, i.e., it travels a longer way through the glass, hence the vignetting towards the side of the image frame. So there’s no difference what filter size you use on a given lens. However, concerning the filter frame ‘getting in the way’, it can be even an advantage to use a larger filter and an adapter – but only when you stack filters: Because only one ring ‘gets in the way’ (that of the adapter), and not those of the other filters on top, because their frame is larger and outside of the actual visible field. Is this comprehensible? It’s a little hard to describe. :-)
Hope this helps,
Flow
Hi
Thanks for the reply, yes it’s clear,although i think that in terms of vignetting 77mm filter vs 77 to 82mm step up ring with 82mm filter will give(theoretically) the same result, not more, not less vignetting(it’s only 2.5 mm more on each side for 82mm filter).
Do you think that the ultimate vignettins solution is just to use 100mm square filter.
Do you think so?
Hey Maxim,
You’re right, and that’s what I meant: There should be no real advantage for just one filter, but there can be one when stacking. However, if you have lenses (or plan to have) that are larger than 77mm, getting a larger filter isn’t a bad idea.
Not sure about the quality of the available square filters, to be honest, of course that’s the most universal solution, but in terms of vignetting, vignetting shouldn’t be a too big problem anyway. Which brings me to the question: Do you have a problem with a standard filter frame getting “in the way” with your 24-70 lens? Because with the tested lens, I could go down more than just 24mm before I had to worry about the issue (as said in the review). Maybe just test this with your lens and then maybe not worry at all :-)
Best,
Flow
Pingback: ND filters
Pingback: ND filters
I stumbled on this website from Reddit. Just ordered the ND filter mentioned above, this post reinforced the fact that I made a good choice after a lot of research. :)
Cool, great it was a little help. Thanks for your feedback!
White text on (almost) black ?? my eyes hurts !!!
sorry, can’t read your review…
Amazing! Your post was really helpful, already save this website in my favorites. Keep it the amazing quality!
I do not find that colour casts/flairs/vignettings mater that much, But sharpness can be big problem. It is hard to correct… At wide angles it is not apparent, and if you really want to compare/test the optical quality of your filters you should mount them to long lenses (I use 300mm) and take some images…
Sorry to hear that. Get well soon! :-)
Thanks, man!
Hey Nikola, thanks for your feedback and your input!
Yes, it may be the case with long lenses, the filters show different qualities regarding the sharpness (it’s also logical that vignetting is not an issue there). However, I never use ND filters on long lenses, so for me, that’s not an issue that I’d notice. As opposed to the vignetting, which is a general problem on wide-angle lenses.
Just out of interest: What’s a use case for 300-mm-lense with a 1000x ND filter on it?
Thanks,
Flow